First we will explain what this instance would be in our Oracle Cloud. An instance is just the name given by Oracle to a virtual machine. Just as you could potentially use VitualBox to create a virtual machine on your computer to run different applications, Oracle does this same process.
Using the “Always free” version you can create a virtual machine that allows you to use 4 Vcores and 24 GB of ram. With this virtual machine, you could run multiple applications.
In our case we will run most of our applications using Docker. This is due to the flexibility of the installations. You can test, modify, uninstall and everything will work efficiently.
One of the limitations of our Oracle cloud is the amount of weaponry we have. We can utilize up to 200GB of our capacity which you can be deity in every virtual machine you want to create. But this means that if you create just one virtual machine for us, we will be able to use a maximum of 200 GB which is not enough to create a vast library.
If you consider the average 1080p movie for us, you will find 3GB movies. But if you want better quality like a 4K movie then you’ll end up using around 33GB. The size of a movie will depend on the length of this movie, and the “Bitrate” of the movie.
This means that you will be able to have an average of 60 movies in 1080p and a maximum of 6 movies in 4K. But I believe that no one wants to keep such a limited library.
Then comes the need to find other methods to understand our capabilities. One of those options would be to use the cloud system. There is still the need to use Rclone to make a connection between our cloud.
With this in mind, to install Jellyfin first you will need to have Rclone up and running on your file server.
If you don’t have Rclone installed then take a look at the link below where I showed you how to configure Rclone.
Now we can go to the next step. First we must have the Docker Installed.
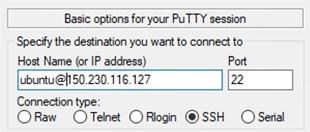
For this you must connect to your server via SSH. In my case, I like to use PuTTY, however you can use whatever program you like best. In the case of PuTTy, you should configure it according to the photo below. Also, don’t forget to add your private key.
But what would this Docker program be. Docker is a set of platforms and services that use the idea of virtualization to manage different packages. These packages are known as containers.
Each container is isolated from each other and has all the necessary components such as software, libraries and configuration files. Depending on their configuration, the containers can communicate with each other, thus carrying out specific activities for the functioning of each program.
With that in mind, we should now begin our installation. To do the installation, we must first download the ones from our information package, for that, you will need to use the command:
curl -fsSL https://get.docker.com -o get-docker.sh
Now it’s time to install our Docker. For this we will use the following command:
sudo sh get-docker.sh
If your installation was done correctly, you should now have the following page:
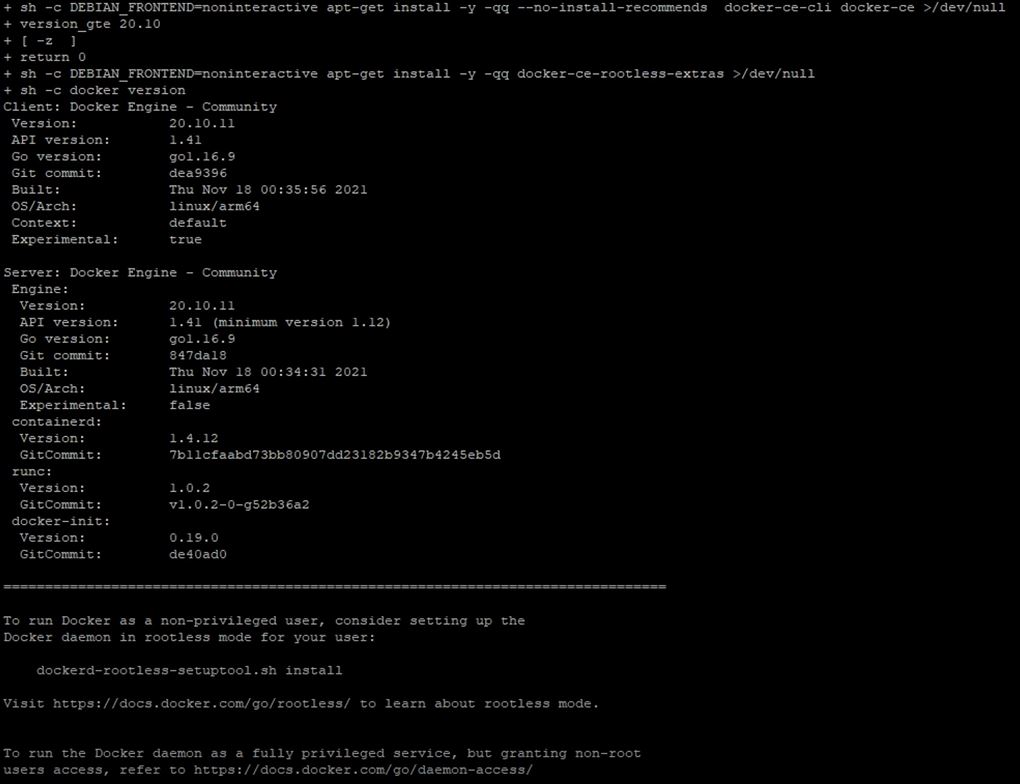
This way you will know which version of Docker is running on your system.
Now it’s time to configure your first container. In our case we want to manage all the apps that we will install in our Docker. The easiest way to do this is to use Portainer.
To install our Portainer, first we must create our Volume so that our program can be installed, to create our volume, we must use the command:
sudo docker volume create portainer
Having created our volume, now we can do our installation, we can create our container, for that, we will use the command:
sudo docker run -d -p 9000:9000 –name portainer –restart always -v /var/run/docker.sock:/var/run/docker.sock -v portainer:/data portainer/portainer-ce:latest -H unix:///var/run/docker.sock
Once our Portainer has been installed, it’s time to release some ports in our Firewall.
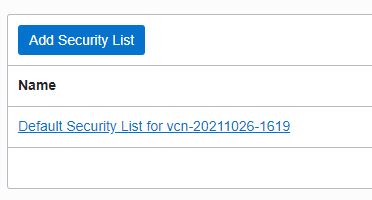
So we’ll go back to the Oracle cloud page, and let’s re-enter our instance. And let’s go to the “Vitual Cloud Network”.
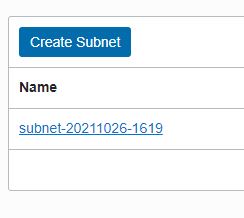
After that we will select our sub-net.
Finally, we will join our security list where we will allow the traffic of the necessary ports.
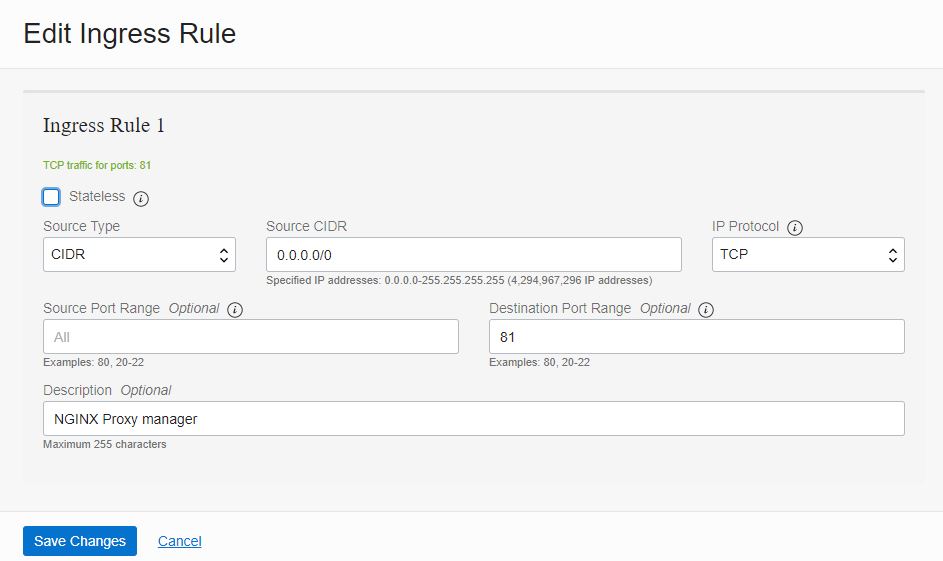
Now let’s add our port permissions. Below is a list of the ports to be released:
Port 80 –Protocolo HTTP
Port 81 – NGINX Proxy manager
Port 443 – Protocolo HTTPS
Port 8096 – Jellyfin
Port 9000 – Portainer
The port configurations will look like the photo below.
We now officially have access to our apps. Now we can start installing the other apps.
To start installing our other applications, we will have to log into our Portainer using port 9000. You will need to use the IP of our virtual machine followed by :9000.
First time you access this site, the page to create your user will appear. So you just need to define your username plus your password.
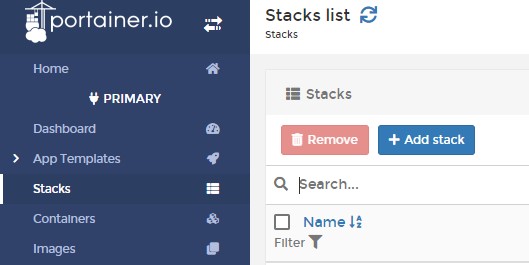
Once you have defined your username, you will need to enter the stock area so that you can create our first stock.
The first Container to be created will be the NGINX Proxy Manager, where you can get more information on the website: https://nginxproxymanager.com/
However as the site has changed, so we no longer have access to our Docker compose complete with the database, however all is not lost, as you can use the Docker compose below:
version: ‘3’
services:
app:
image: ‘jc21/nginx-proxy-manager:latest’
restart: unless-stopped
ports:
– ’80:80′
– ’81:81′
– ‘443:443’
environment:
DB_MYSQL_HOST: “db”
DB_MYSQL_PORT: 3306
DB_MYSQL_USER: “sauberlab”
DB_MYSQL_PASSWORD: “test123”
DB_MYSQL_NAME: “nginx”
volumes:
– /mnt/nginx/data:/data
– /mnt/nginx/letsencrypt:/etc/letsencrypt
db:
image: ‘jc21/mariadb-aria:latest’
restart: unless-stopped
environment:
MYSQL_ROOT_PASSWORD: ‘test123’
MYSQL_DATABASE: ‘nginx’
MYSQL_USER: ‘sauberlab’
MYSQL_PASSWORD: ‘test123’
volumes:
– /mnt/nginx/data/mysql:/var/lib/mysql
If your installation was successful, you will have 2 new containers, the NGINX app and the NGINX Database:

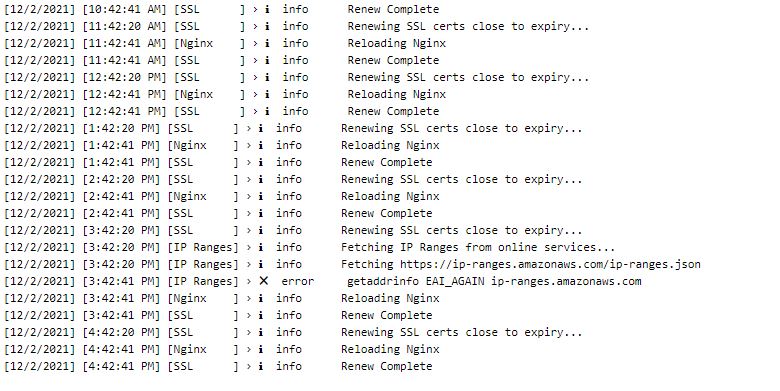
If we open our NGINX app log – in the logo part, you have to wait for information similar to the image below to appear:
Finally we will install our last container, this time it’s our Jellyfin. For more information about the used Jellyfin image, you can access the website: https://hub.docker.com/r/linuxserver/jellyfin
The Docker container used in this stock can be seen in the box below:
—
version: “2.1”
services:
jellyfin:
image: lscr.io/linuxserver/jellyfin
container_name: jellyfin
environment:
– PUID=1000
– PGID=1000
– TZ=Europe/London
– JELLYFIN_PublishedServerUrl=192.168.0.5 #optional
volumes:
– /path/to/library:/config
– /path/to/tvseries:/data/tvshows
– /path/to/movies:/data/movies
– /opt/vc/lib:/opt/vc/lib #optional
ports:
– 8096:8096
– 8920:8920 #optional
– 7359:7359/udp #optional
– 1900:1900/udp #optional
devices:
– /dev/dri:/dev/dri #optional
– /dev/vcsm:/dev/vcsm #optional
– /dev/vchiq:/dev/vchiq #optional
– /dev/video10:/dev/video10 #optional
– /dev/video11:/dev/video11 #optional
– /dev/video12:/dev/video12 #optional
restart: unless-stopped
After running this stock, we will check if the installation was successful, for that, in our container, we will go to the log part. If the information appears that our app appears as “done”, it means that we can now go to the next step. This next step will be the configuration of our apps.
Now let’s start making our configuration. The first application we will configure is the NGINX Proxy manager. To do this, and simple, we will first open port 81.
The initial username and password for this app can be found in the box below.
Email: [email protected]
Password: changeme
Once you have created your first user, you can go to the Dashboard part and start adding your domains.

The type of applications we will be working on will be Poxy Hosts. To add a new proxy host, you will need to add the complete website of your domain, the IP of the machine you want to do port forwarding and the port. In our case we will use port 8096 because we want to configure Jellyfin.
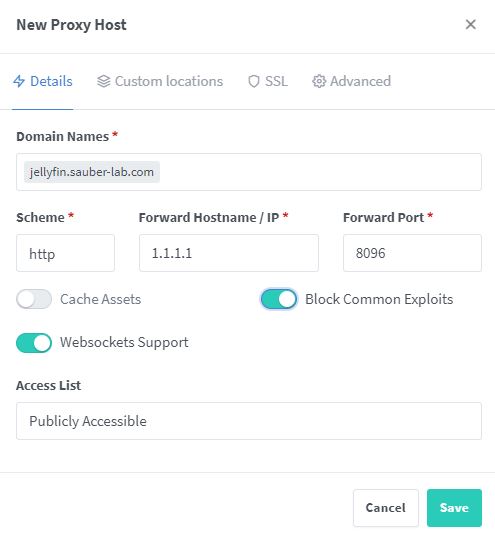
To generate our certificate, you will need to go to the SSL tab and change the option to “request a new SSL Certificate”.
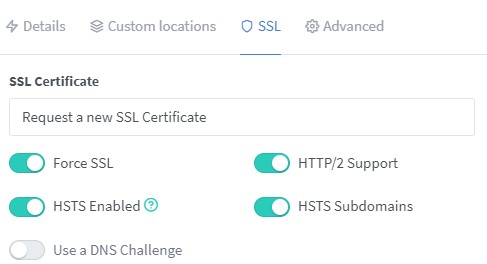
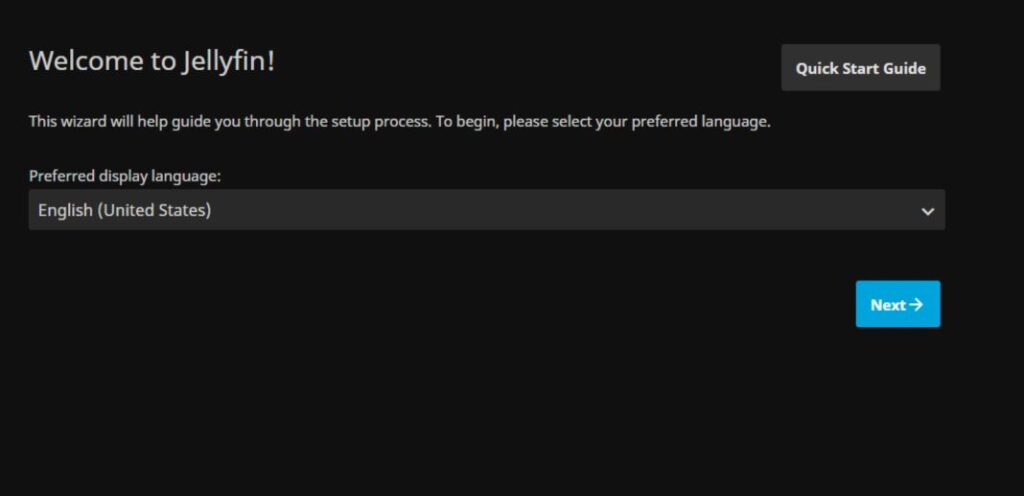
Once your website has been created and the certificate generated, you will need to access this website in order to start configuring the system.
First time to Jellyfin, you will be come across this page, where you will need to add the language you want your app to work:
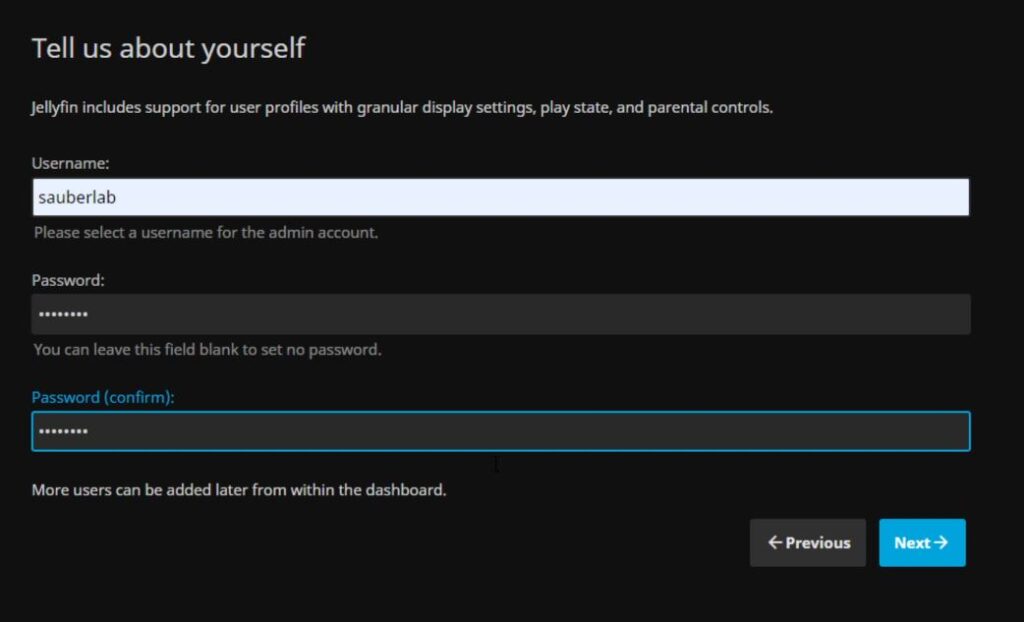
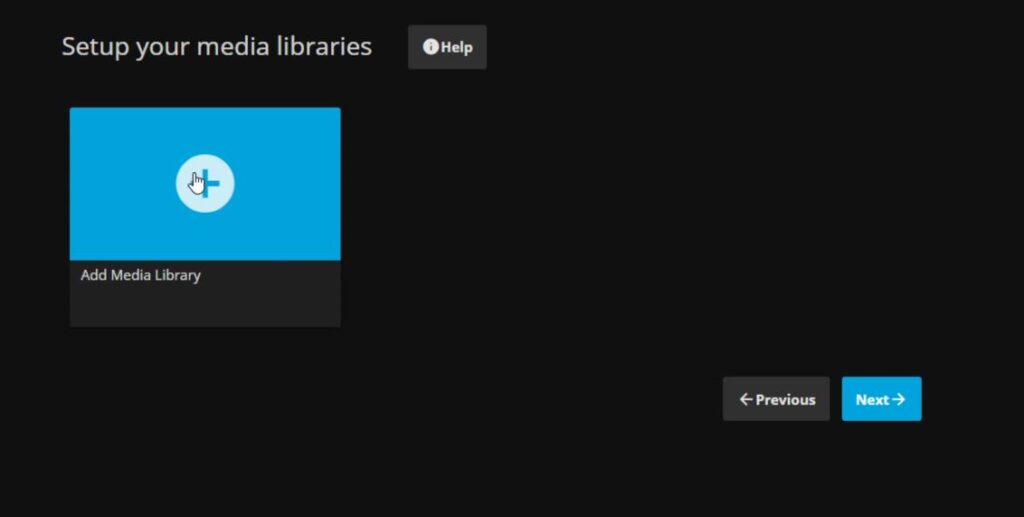
After that, you will need to create the admin user and password. This user will have permission to manage your application.
Having created your user, you will have to add your library. This step will be very simple, just define the type of average and its respective destination in your Rclone.
Now you can enjoy your Jellyfin running on Oracle Cloud.