Home Assist is a system that allows you to automate your home so that you can manage devices and do some integrations to make your home more integrated. I don’t believe you limit your imagination.
However, the home wizard offers some installation methods. I don’t believe there’s one better than the other, it just works better than or will meet your needs. In the photo below you can see more about the comparison that is posted on the Home Assistant website:
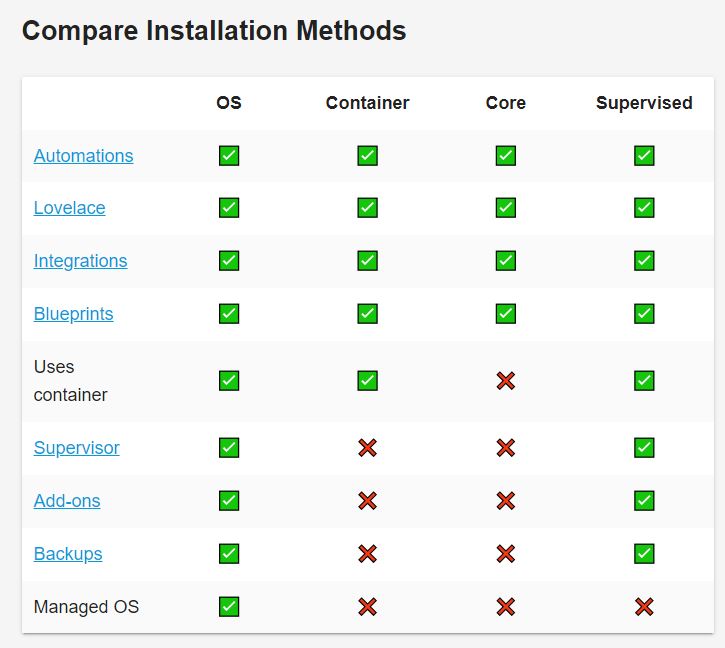
When the installation is done in OS mode, the device that had Home Assist will be exclusively dedicated to this OS. One of the advantages of this installation is the functionality, so you have access to everything that HAS can offer you.
If you follow the installation as a container or core, you’ll have more flexibility, but you don’t have the option to use all the functionality that this program can offer.
Hence the Supervised option, in which this installation mode provides the complete HAS experience on a normal operating system, of course meeting some criteria that will be discussed below. This means that all Home Assistant OS components and functionality will be present except operating system control.
When using Home Assistnat Supervised, the responsibility for ensuring that all necessary components are installed and maintained rests with the user. Because HAS will not control this information.
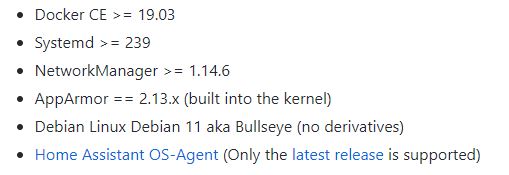
To install this method, you will need to have some necessary components such as those specified in the link:
https://github.com/home-assistant/architecture/blob/master/adr/0014-home-assistant-supervised.md
In short, for you to have the A.H. working, you will have to have it installed and the following components:
Lorem ipsum dolor sit amet, consectetur adipiscing elit. Ut elit tellus, luctus nec ullamcorper mattis, pulvinar dapibus leo.
With everything clear, we can now start installing our system.
As always initially we must update your system. For that, you’ll have to use the following command:
sudo apt-get update && sudo apt-get upgrade
Having our OS updated, now comes the time to install the necessary applications.
For that we will run the following command:
sudo apt-get install jq wget curl avahi-daemon udisks2 libglib2.0-bin network-manager dbus -y
Once you have these applications installed, then it is interesting to run the command below to fix all the programs that were not running correctly before.
sudo apt –fix-broken install
Then we must restart our system to ensure that all applications are being used correctly. To do this, use the command below.
sudo reboot
Now comes the time to install Docker. For that first we must download our official Docker script. So we will use the command:
curl -fsSL https://get.docker.com -o get-docker.sh
Now we can run our script. For this, we will use the code below:
sudo sh get-docker.sh
Perfect, we’ve just done the installation of Docker, but the user hasn’t been added to our system yet, so you should use the command below:
sudo usermod -aG docker sauberlab
Lorem ipsum dolor sit amet, consectetur adipiscing elit. Ut elit tellus, luctus nec ullamcorper mattis, pulvinar dapibus leo.
docker –version
Let’s now install the Home Assistant OS Agent app. For that we must download this application, so we will use the command:
wget https://github.com/home-assistant/os-agent/releases/download/1.2.2/os-agent_1.2.2_linux_x86_64.deb
Remember, this version will only work for X86 X64 system, if you are installing on a Raspberry PI, you will have to install the Arm version.
So now comes the time to install our agent OS, for that use the command:
sudo dpkg -i os-agent_1.2.2_linux_x86_64.deb
Having everything installed, now it’s time to install Home Assistant-Supervised, first you’ll have to download the installation script, for that use the command:
wget https://github.com/home-assistant/supervised-installer/releases/latest/download/homeassistant-supervised.deb
Now it’s time to install, use the command below:
sudo dpkg -i homeassistant-supervised.deb
Wait a few minutes for the installation to complete. And everything should be working properly.
To access Home Assistant you must use the same IP address as your previous installation plus port 8123. You will have to use the same template below:
http://192.168.X.XXX:8123
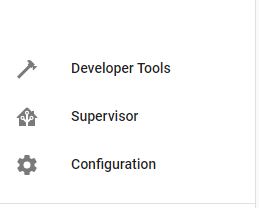
Now comes the part of creating your account. Don’t worry, and just follow these first steps. Such as create your user, define your location. Having finished this first step, welcome to your life at Home Assistant, with the advantage of having the supervisor option, as shown in the photo below:
To complete the Installation of these programs, I suggest you install Portainer. For that, you must create the volume of this application. For this you should use the command:
sudo docker volume create portainer_data
Having finished creating our volume, now let’s install our Portainer. To do this, just use the command below:
sudo docker run -d -p 9000:9000 –name portainer –restart always -v /var/run/docker.sock:/var/run/docker.sock -v portainer_data:/data portainer/portainer-ce:latest -H unix:///var/run/docker.sock
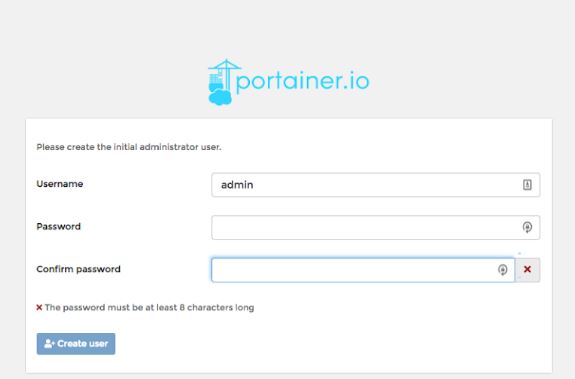
Finally, just access port 9000. And create your password as shown in the photo below:
Now you’ve just finished all the steps of your installation.